Steps - How to Move SharePoint Items?
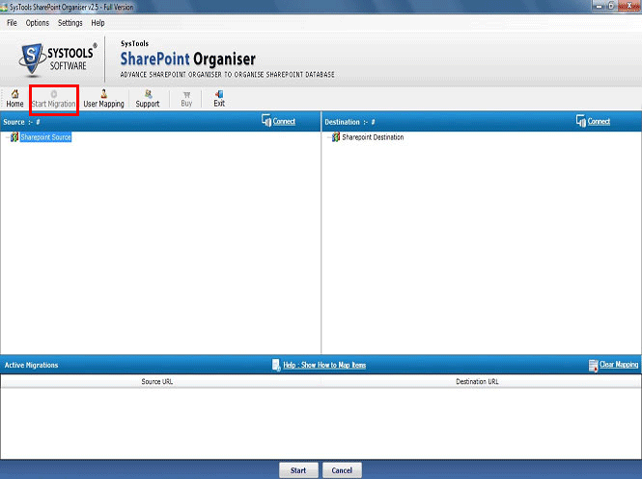
- Firstly, Install and Run SharePoint Organiser. Then Click on "Start Migration Option"
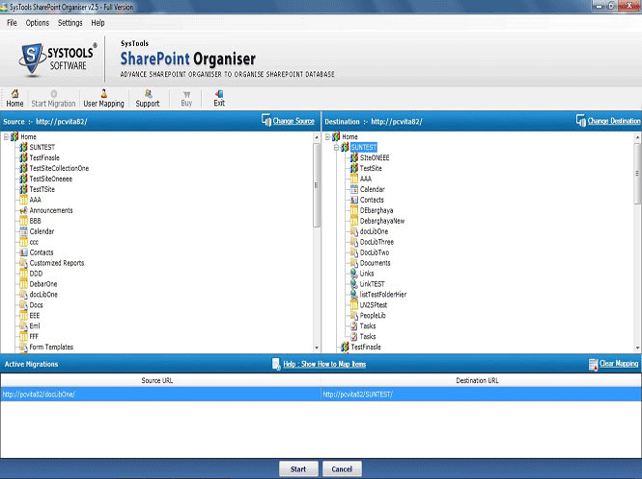
- Click to "Connect" button on Left Panel to Connect Source
Enter Source Credential and Click on "Login"

- Now, Click to "Connect" button on Right Panel to Connect Destination
Enter Destination Credential and Click on "Login"

- Software will display entire Preview in explorer view of Source and Destination items such as: Documents, List, Sites, Library folder.
- Software provide two options: Copy/Paste and Drag/Drop to execute migration process of SharePoint to Office 365, Office 365 to SharePoint, Office 365 to SharePoint, Office 365 to Office 365.
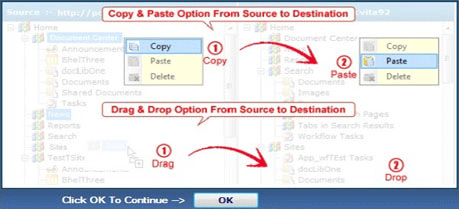
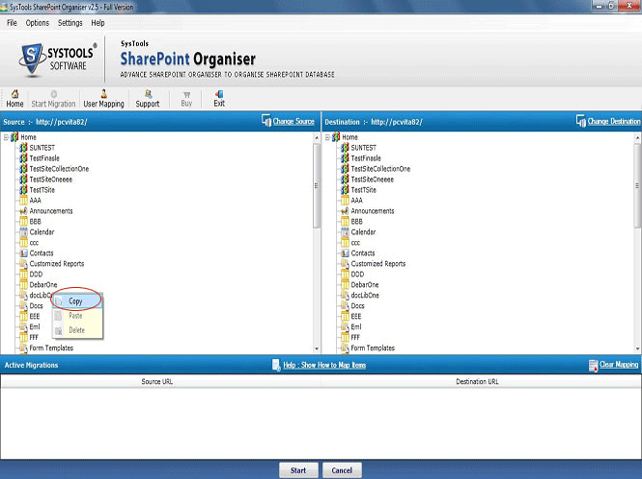
- Copy Source: Right click on the source component and choose "Copy" option on Left panel
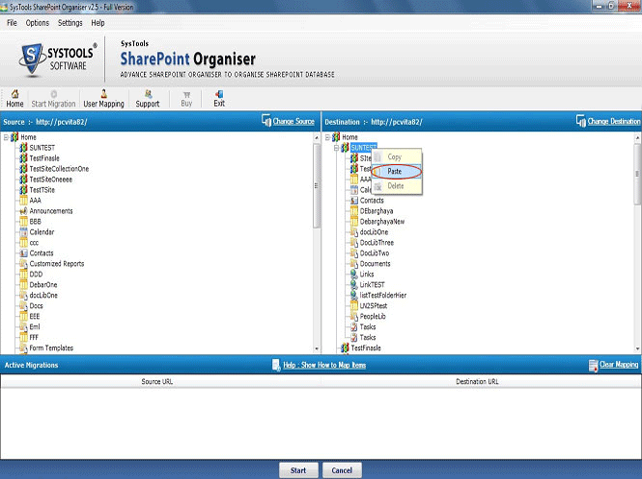
- Paste Destination: Right click on the destination component and choose "Paste" option on Right panel
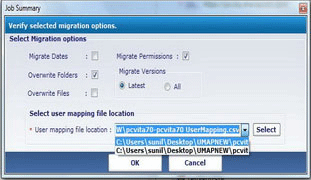
- In Filter option to Select Migration options: Migrate Dates | Migrate Permissions | Overwrite Folders | Overwrite Files |Migrate Versions (Latest or All) » Select User Mapping File Path » OK
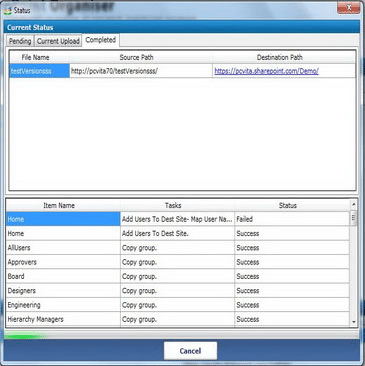
- After clicking "OK" software display "Progress status": View Target SharePoint Location, Job Name, Job Status, Total Number of Files, Total File Processed, Number of Errors, Pending, Current Upload and Completed
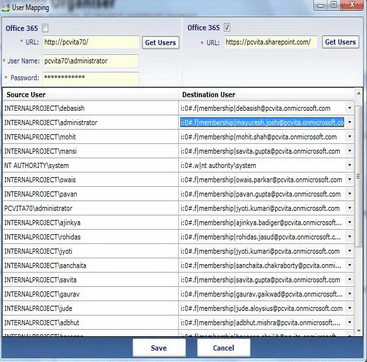
- Choose User Mapping: Enter User Name, Password and URL of Source and Destination » Click on "Get User" » Click "Save" button